As a native San Franciscan, my knowledge of San Francisco is…let’s just say there’s not much that gets past me in my 7×7 city. This San Francisco photography guide will set you up for taking all those iconic images of memorable monuments.
Ultimate San Francisco Photography Guide
In this photography guide to San Francisco, you’ll discover where to photograph these destinations…
Golden Gate Bridge and Transamerica Pyramid – Hawk Hill
San Francisco Skyline best View – Treasure Island
San Francisco Heart – Suthro Baths
Best San Francisco Sunrise – Kirby Cove
San Francisco City at Night – Twin Peaks
San Francisco Photography Tips with Google Maps and the best time of day to visit.
If you’re craving a cornbread muffin, I can tell you where to get them hot! Want to see the new MOMA SF, I got you covered! And for all of you morning risers, I can show you where to take the best sunrise spots. When it comes to taking pictures, my San Francisco photography guide has got you covered.
Want to learn to take better photos? Check out the Best Landscape Photography Tutorial Ever!
For the sake of this article and The PlanetD, let’s focus this adventure on photography in SF.
I’ll be giving 5 of my favourite spots along with when is the best time to shoot.
And I’ll even be giving you local San Francisco hashtags and Instagram hubs so you can have a chance of a feature for all of you Instagrammers out there!
Without wasting too much time, let’s get a move on to the Ultimate Photography Guide to San Francisco!
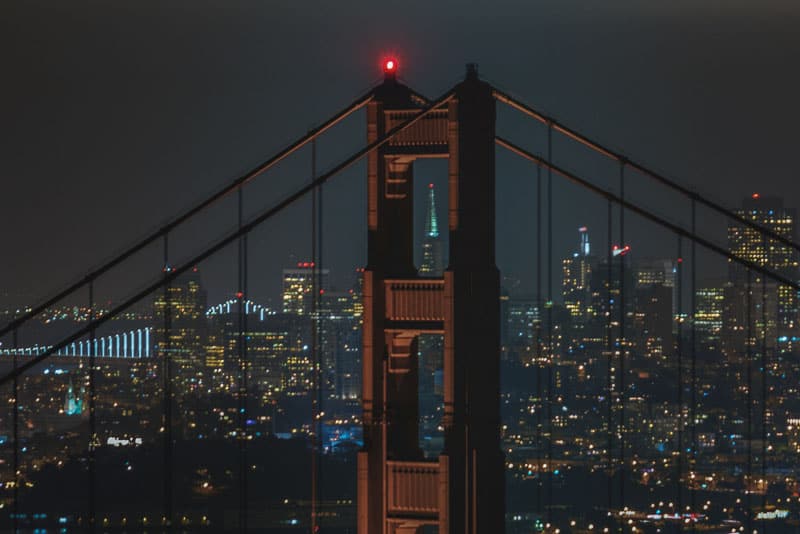
1. Hawk Hill – Two Icons In One Shoot
View from Hawk Hill
It took me a while to find where the Transamerica Pyramid aligns with the Golden Gate Bridge, but I finally did! It is kind of tricky to get here, but I’m going to make it as simple as possible. Read: The Best Things to do in San Francisco
How to Get to Hawk Hikk – Two Icons
Go to Google Maps and type in “Conzelman Rd, Mill Valley, CA.” You should see a turning circle. This is where you’d want to set your navigation to. Once there, you should see a dirt parking lot with a bathroom next to it. Park there.
Walk across the turning circle to get to a dirt path (WARNING: don’t walk too far out as there is a cliff!). I’d recommend going when there is light out to scope the place out, then coming back at night or early morning to get the shoot.
Also, this area can be a little creepy late a night so bring a flashlight. Also, watch out for raccoons! Walk up the dirt place for about 5-10 minutes (be careful as some parts are narrow) until you see the two align.
Best Time to Shoot: Night
What Gear/Lens is Best: Tripod, Long Zoom Lens
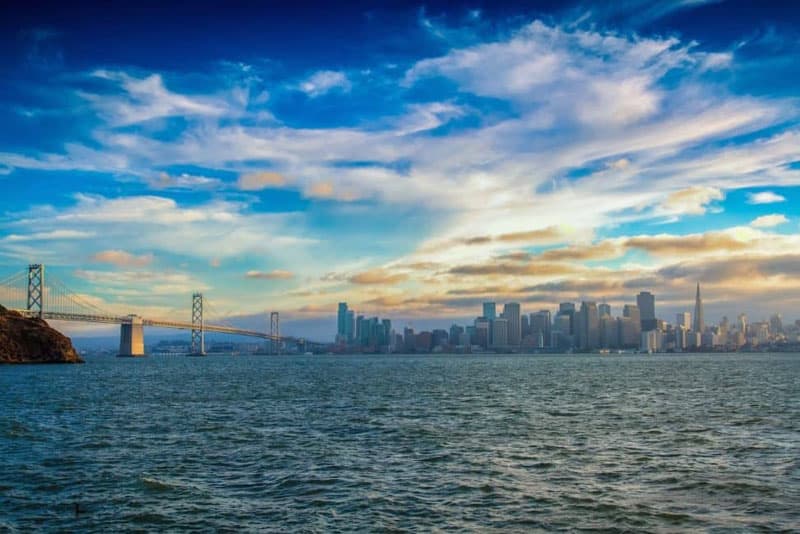
2. Treasure Island – San Francisco’s Skyline
View from Treasure Island
Treasure Island has one of the best views of San Francisco’s beautiful skyline. Hong Kong’s Victoria Peak is up there too) Just across the Bay Bridge, Treasure Island is the easiest to get to. You may also like these other views from an American City – The Best Views of Manhattan
The most difficult part might be finding parking, but hey, that’s San Francisco for Y’all!
How To Get to Treasure Island:
Hop on the freeway and take I-80 E to Treasure Island. Stay on the far left lane when entering the Bay Bridge as the exit is a sharp left turn in the middle of the bridge. Continue to follow the road. You’ll soon see the city skyline on the left. I’d park somewhere near the Hot Dog stand if a tour bus isn’t hogging the area.
What Gear/Lens is Best for photographing in San Francisco: Telescope (you can see the Golden Gate Bridge from here too), Wide Angle, ND Filter (if you like a silky smooth water), Tripod
Best Time to Shoot in San Francisco: Sunset, Night
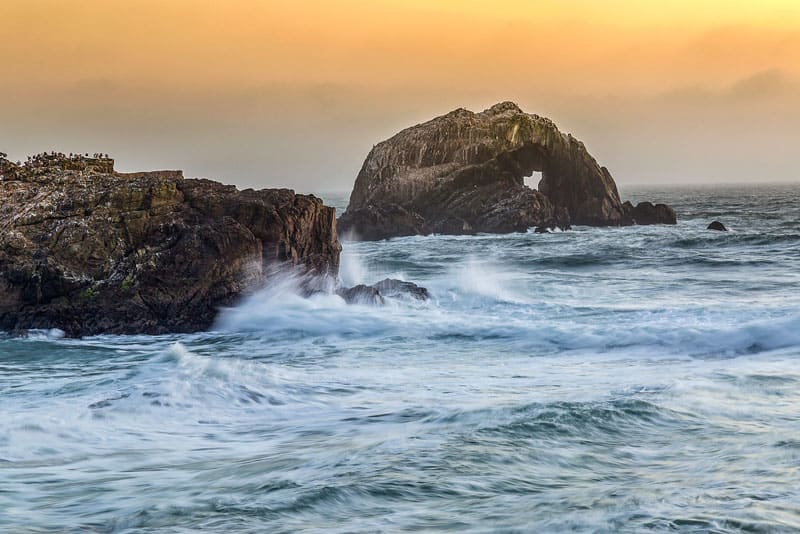
3. Sutro Baths – San Francisco’s Heart
San Francisco Heart
Sutro Baths have to be one of my favorite spots in San Francisco. Being by the water, enjoying the breezy, finding San Francisco’s Heart is just a calming experience and makes for a great place for landscape photography.
The parking lot can get filled up quickly and the stairs down to the baths can be a workout, but don’t let this detour you from this enchanting place. Make sure to explore this place thoroughly as there is a cave, a rock-shaped heart (can be seen next to the cave), structural ruins, trail hikes, and much more.
Read: How to Improve your Photography with Filters
Traveling to San Francisco? Make sure to Pick up your Lonely Planet Travel Guide
How To Get To Sutro Baths:
It is pretty straightforward to get to Sutro Baths. Just enter “Sutro Baths” in your GPS. Once again the most difficult part is finding parking and the many stairs down..and up to the Baths.
Best Time to Shoot: Sunset
What Gear/Lens is Best: Wide Angle, ND Filter, Tripod
4. Kirby Cove – Best Sunrise Photography San Francisco
San Francisco Bridge: Sunrise at Kirby Cove
Kirby Cove is a gem. Off of a hiking trail in Hawk Hill, Kirby Cove is a secluded beach equipped with a man-made swing so you can enjoy the waves crashing by under the Golden Gate Bridge.
How To Get To Kirby Cove:
Type in “Kirby Cove” in Google Maps and navigate there. Park along the left side.
Make sure to not leave any valuables in the car or anything that looks worth stealing. There are many car thieves that break into cars here!
After parking, walk up towards a gated path. It should say “Kirby Cove.” The walk down the path is easy and is about a mile long taking around 20-25 mins.
You may see deer roaming around so keep your camera ready to snap.
What Gear/Lens is Best: Wide Angle,Tripod
Best Time to Shoot: Sunrise
More great California photography tips: Photography Guide to Big Sur
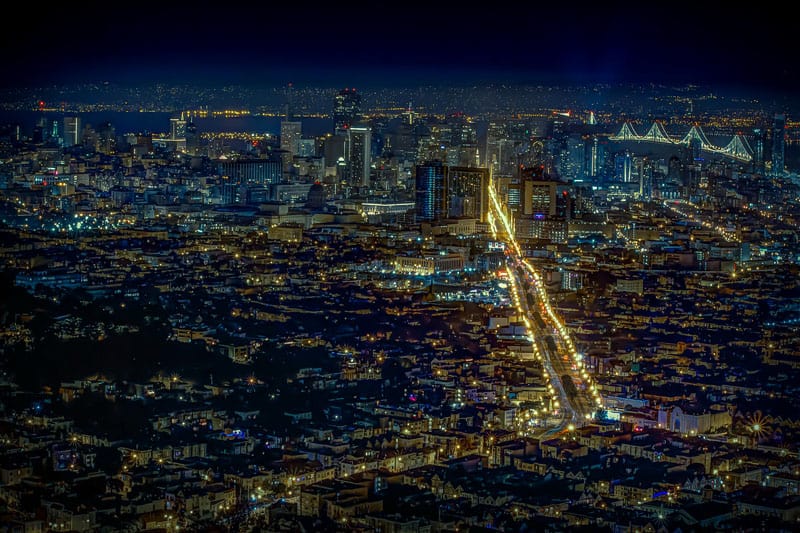
5. Twin Peaks – The City Glow
San Francisco View from Twin Peaks
Twin Peaks has one of the best views of the city. You can see all of downtown, the Bay Bridge, and even the Golden Gate Bridge.
How To Get To Twin Peaks:
Once again, just enter “Twin Peaks” in Google Maps. It’ll take you to the top of the peak where you’ll find a parking lot. This requires minimal effort as the view is just right there. Not a lot of walking! If there’s no parking, I usually just go around the hill and park on the side.
This area can be a little dangerous if you are not familiar with the area. Some roads turn from a one-way to a two-way traffic! BE CAREFUL especially at night or when it is very foggy! Always drive slow, keep your headlights on and READ THE SIGNS!
Best Time to Shoot: Night
What Gear/Lens is Best: Wide Angle, Short Zoom, Long Zoom, Tripod
Note: San Francisco Hubs are the same handle as their hashtags!
More Travel Photography Resources
Author Bio: Eric Bravo runs a travel photography blog called Let’s Go Bravo providing travel guides to popular destinations geared towards travel photographers.
Follow His Social Media Accounts: Instagram: @letsgobravo Facebook: Let’s Go Bravo Twitter: @ericbravo YouTube: Let’s Go Bravo
Eric’s hope is to give readers an informative overview of their next destination, to ease the stress of researching the nitty-gritty of travel to find that happy balance of getting the shot and immersing in a new culture.
These travel guides include suggested accommodations, transportation, food & drink, things to do & see, and most importantly, the best photography spots in the area.